Table of Contents
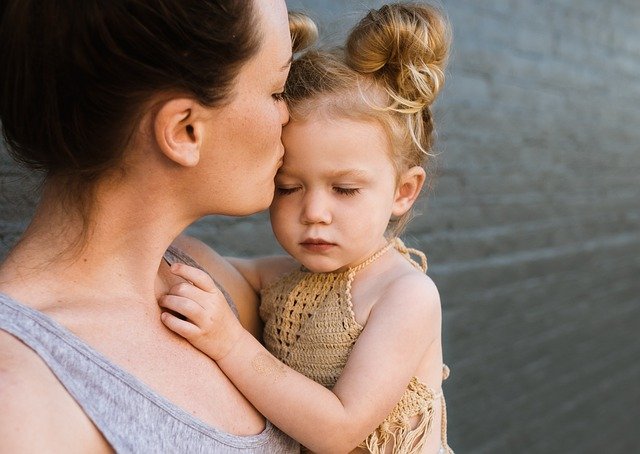
Traveling with your baby can be lots of fun. Keeping up with tons of little clothes and counting every pacifier is very well organized. Amid the confusion, one important action tends to give new parents trouble: safely washing baby bottles when they’re away from home. Be at ease, tired wanderer! It is essential to keep your baby’s bottles clean and fortunately, there are smart methods to do this no matter where you go.
This article aims to give practical tips that help you sterilize baby bottles correctly all the time, no matter the situation. First, we’ll look at how to sanitize baby bottles at home, and afterwards, we’ll talk about methods that help you out while on the road. Make certain that your baby’s meals are safe and clean, even when you travel through many time zones.
Why Sterilization Matters: Understanding the Guidelines
Before exploring the process, let’s remember the main reasons for doing this. Soap and water help remove milk residue and most germs, yet sterilization (or sanitizing) beats that, killing unwanted bacteria and viruses.
The CDC recommends extra precautions for bottle sterilization for certain people.
- Babies under 2 months old: Their immune systems are still developing, making them more vulnerable to infections. Sterilizing bottles daily is crucial during this period.
- Premature infants: Similarly, preemies have immature immune systems and need extra protection.
- Babies with weakened immune systems: For any baby who is immunocompromised, strict sterilization practices are essential.
Generally, bathing babies who are over 2 months with hot, soapy water and letting them dry in the air is enough for everyday cleaning. Still, sterilizing your baby’s bottle now and then is wise, especially if cleanliness is a concern or your child is not well. If you’re on the road and the water may be unsafe or cleaning facilities are limited, you should care about the healthy sterilization of baby bottles, no matter your infant’s age.
Your Go-To Methods for Sterilizing Baby Bottles at Home
Make sure you know how to sterilize baby bottles at home even before preparing everything for your trip. They give you confidence to deal with any situation.
1. Boiling Water Method: This is the classic, foolproof way.
How to do it:
- Collect the pieces such as bottles, nipples, rings and caps.
- Wash the beer bottles with hot, soapy water and use a bottle brush to do so.
- Put all the vegetables in one big pot filled with water so that all the pieces are covered.
- Heat the water until it comes to a strong boil and boil it for more than 5 minutes.
- Take out each piece using clean tongs, shake off the extra water and lay them on a clean drying rack for them to dry completely.
Pros: Simple, effective, no special equipment needed
Cons: Requires a stovetop and a large pot; parts can get very hot, potential for mineral buildup on bottles over time.
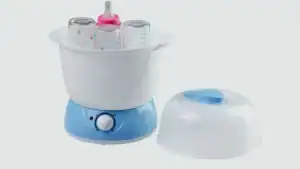
2. Electric Steam Steriliser
How to do it:
- Wash the bottle, nipple and cap as you do with clean bottles.
- Turn the nipples downwards and place them in the electric sterilizer as suggested by the manufacturer.
- Put the right amount of water into the base. Just push a button, and the machine will take care of sanitizing your bottles with steam in a brief time.
Pros: Quick, convenient, automatic shut-off, no heavy lifting of hot water.
Cons: Requires dedicated counter space, initial purchase cost, and needs electricity.
3. Microwave Steam Sterilizer Bags/Units:
How to do it:
- Clean all the bits that go into the bottle.
- Pour some water in the bag or unit, put the bottles in and follow the recommended microwave time (usually between 1.5 and 6 minutes).
- The steam is able to kill bacteria and other microbes in the equipment.
Pros: Very fast, compact (especially bags), great for small batches.
Cons: Requires a microwave, bags are single-use or limited-use, specific microwave wattages needed.
4. Dishwasher with Hot Water Cycle:
How to do it: Place thoroughly rinsed bottle parts (nipples and small parts in a mesh bag or top rack) in the dishwasher. Use hot water and a heated drying cycle.
Pros: Extremely convenient, effectively cleans and sanitizes.
Cons: Not every dishwasher gets hot enough to fully sterilize (looking at the manufacturer’s guidelines), bottles may not dry thoroughly, and this could damage the bottles as time goes by. According to the CDC recommendations for bottle sterilization, this approach is suitable for sanitizing surfaces instead of sterilizing them.
Traveling with a Baby? Try These 5 Genius Baby Bottle Sterilizing Hacks!
The real-world problem is how you handle trigonometry on the go.
Don’t waste time with sterilizers; some situations need an easy and quick solution.
The ideas in this answer allow you to sterilize your baby’s bottle even if you are not close to your home.
Hack 1: The Boiling Method (Your Portable Powerhouse)
Of course, it’s the well-known one, but it’s your most valuable partner when you travel. Usually, you will find a kettle or place to cook grub on the stove in the kitchen of your hotel or rental place. In some cases, there is a heat source available in the camping area.
- How to do it: Take out a pot, pan or large kettle that is clean. Bring water to a boil and keep the bottle’s components in it for at least 5 minutes. This is the best way to kill germs when you cannot use another option. Always have a small tool to brush your sink and travel dish soap, just in case.
- Why it’s genius: Universally applicable where a heat source and water are available. Simple, effective, and requires minimal specialized equipment.
Hack 2: Portable UV Sterilizers (The Modern Marvel)
These compact gadgets use UV-C light to kill germs. They’re battery-operated and don’t require water or heat.
- How to do it: Ensure bottles are thoroughly washed and dry. Place them inside the UV sterilizer. Close the lid and activate the UV cycle (usually a few minutes).
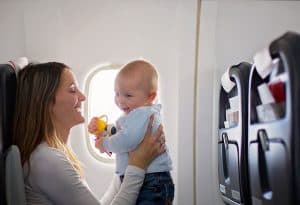
- Why it’s genius: Perfect for quick sterilization in hotel rooms, cars, or even on planes. No water, no mess, no waiting for things to cool down. Ideal for sanitizing baby bottles for newborns on the fly.
- Considerations: Still requires pre-washing, and UV light only sterilizes surfaces directly exposed to the light.
Hack 3: Sterilizer Tablets/Solution (The Chemical Cavalry)
These are lifesavers when you don’t have access to boiling water or electricity, or when you need a bleach solution for bottle sterilization alternatives.
- How to do it: Fill a clean container, such as a basin or a big Ziploc bag, with water and add a sterilization tablet (or use the liquid if you have some) to kill the germs in the water. Make certain all the components are submerged in the water and that there are no air bubbles, and soak them for the amount of time given (normally 15-30 minutes). Pick up the pieces with clean tongs, shake off the fluids and set them aside for drying in the air. Baby-safe formulas do not need to be rinsed off since they evaporate away harmlessly.
- Why it’s genius: Excellent for camping, long road trips, or places with unreliable power. Very effective and can sterilize multiple items at once.
- Considerations: You should use a set container and access to clean water is needed for washing the clothing in the beginning. Follow the product directions step by step at all times. The CDC advises adding 2 teaspoons of unscented bleach to one gallon of water, letting it rest for 2 minutes and then drying the bottle with fresh air. Performing CPR rapidly becomes very helpful during emergencies.
Hack 4: Microwave Sterilizer Bags (The Pocket-Sized Powerhouse)
These lightweight, reusable bags are incredibly convenient for travel if you have microwave access.
- How to do it: Wash your bottles thoroughly. Add a small amount of water to the bag, place your bottles/parts inside, seal the bag, and microwave for the specified time (check bag instructions – usually 1.5-6 minutes).
- Why it’s genius: Compact, lightweight, reusable for a certain number of times, and very fast. Ideal for hotel rooms with microwaves.
- Considerations: Requires microwave access, and bottles will be hot after microwaving.
Hack 5: Sterilizer Wipes (The "Just-in-Case" Quick Clean)
While not a full sterilization method, these can be a quick interim solution for pacifiers, teethers, or quickly wiping down a bottle surface in a pinch.
- How to do it: Simply wipe the surface of the bottle or item with the sterile wipe.
- Why it’s genius: Super convenient for emergencies or quick clean-ups when full sterilization isn’t immediately possible.
- Considerations: These are typically for surface sanitization and not a replacement for full sterilization of bottles, especially for younger infants.
Essential Travel Hygiene Tips Beyond Sterilization
Remember, baby bottle sterilization guidelines are part of a larger hygiene picture:
- Wash Hands: Always wash your hands thoroughly with soap and water before handling clean or sterile bottles.
- Clean Surfaces: Ensure any surface you’re placing bottles on is clean. Carry a small, clean towel or mat.
- Bottled Water for Formula: If you’re using formula, consider using bottled or purified water, especially in areas where tap water quality is uncertain.
- Air Dry Completely: Always allow bottles to air dry completely to prevent bacterial growth. Do not use cloth towels, which can reintroduce germs.
Traveling with a baby takes extra effort, but use these smart bottle sterilizing tips and you can maintain your little one’s feeding equipment safely. Therefore, organize your things, relax and have fun on your trip!
Baby Bottle Sterlization Hacks FAQs:
Daily sterilization is necessary for premature infants, babies under 2 months and those who have weak immune systems. Regular washing should be enough for healthy babies of more than 2 months, while sterilizing can be done every now and then or when water safety is a concern. If ever in question, make sure everything is sterilized.
Yes, clean hotel kettles can be used for boiling bottle parts. Just ensure the kettle is clean before use. It's an excellent hack when a stovetop isn't available.
The CDC talks about mixing 2 teaspoons of bleach per gallon of water as an efficient regeneration solution in a replacement period. Wash each fabric properly, drop it in the water for 2 minutes and then dry it in the air until it’s completely dry.
Absolutely! Every part of the bottle should be washed with hot soapy water and rinsed off before going through the sterilization process. Sterilization works to kill germs, while washing cleans the bottle and bottle teat from milk layers and dirt.
If you have access to a microwave, microwave sterilizer bags are good and portable UV sterilizers are useful in airports or when flying. It is better to sterilize the bottles and nipples in advance, seal the bags and keep them until you travel.